Auth Code Authorization Flow
Tldr
- Prerequisite: a registered App in Microsoft Entra that has the correct permissions. Get the
client_id, theclient_secret, theredirect_uriand thescopefrom the app -
in the browser, call
https://login.microsoftonline.com/common/oauth2/authorize?client_id={{client_id}}&response_type=code&redirect_uri={{redirect_uri}}&response_mode=query
replacingclient_idandredirect_uriaccording to your App. You will receive an authorization code. -
in postman, POST
providing the following form data:
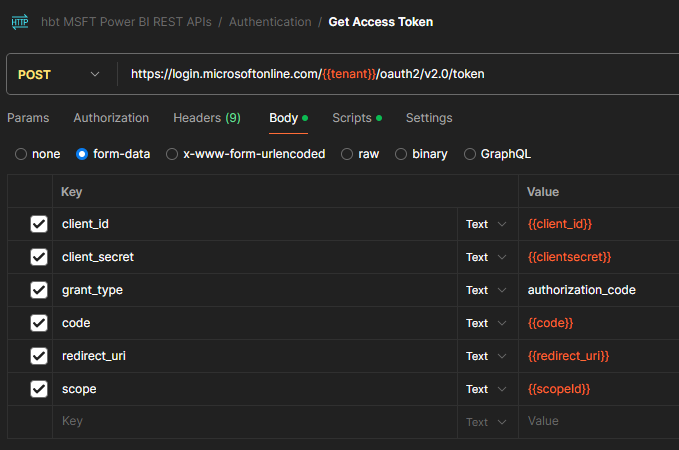
The scopes are:- for azure:
https://management.azure.com/.default offline_access - for Power BI:
https://analysis.windows.net/powerbi/api/.default offline_access - for BC, the scope is:
https://api.businesscentral.dynamics.com/.default
- for azure:
-
the grant_type is
authorization_code - copy the
access_tokenand therefresh_token. Store the refresh_token in departments/delivery/knowledge-base/azure/key-vault/key-vault
For OAuth2, we have the following elements:
- an
API. In this case, we are using two APIs: - Power BI REST API
-
Azure Admin API
-
an
App, consisting of - a
Client ID(aka asApplication ID) - a set of the maximum allowed
Permissionsagainst the APIs which a client can ask for. These permissions are identified through theScope. - a
Secret, making sure that the authentication server knows that a request is indeed coming from the App (and not from some other app pretending to be your app)
We created all these elements in the previous section.
In this section, we use the Entra App to elements to authenticate a user against the Microsoft Identity Platform. Once authenticated, we get a Token that we can use to access the permitted functions of the API.
We have the following participants:
-
the
Client -
the
Authorization Server
Note that the Authorization Server is not the same as the API.
There are the following steps:
-
Request Authorization Code
-
Get Access Token and Refresh Token for the first time (from Authorization Code)
-
Get Access Token for subsequent times (from Refresh Token)
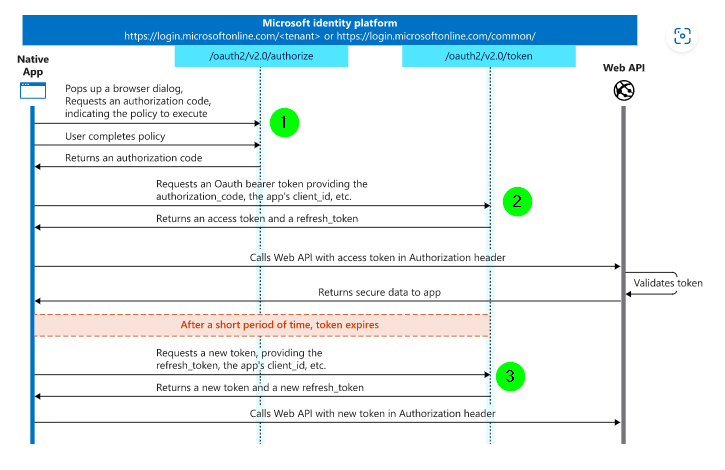
Under normal circumstances, you will do this once per API. However, if you want to debug in Postman while you have your function running already, you want to authorize your user twice against the same API. You will then have two independent sequences of Access- / Refresh-Tokens. Then, since you need to authenticate against two different APIs, you will need to do this 4 times.
1. Request Authorization Code
In this step, we will make a call against the Authorization Server, as a logged-in user. The Authorization Server verifies our identity and returns a Code.
Find the client_id in your App:
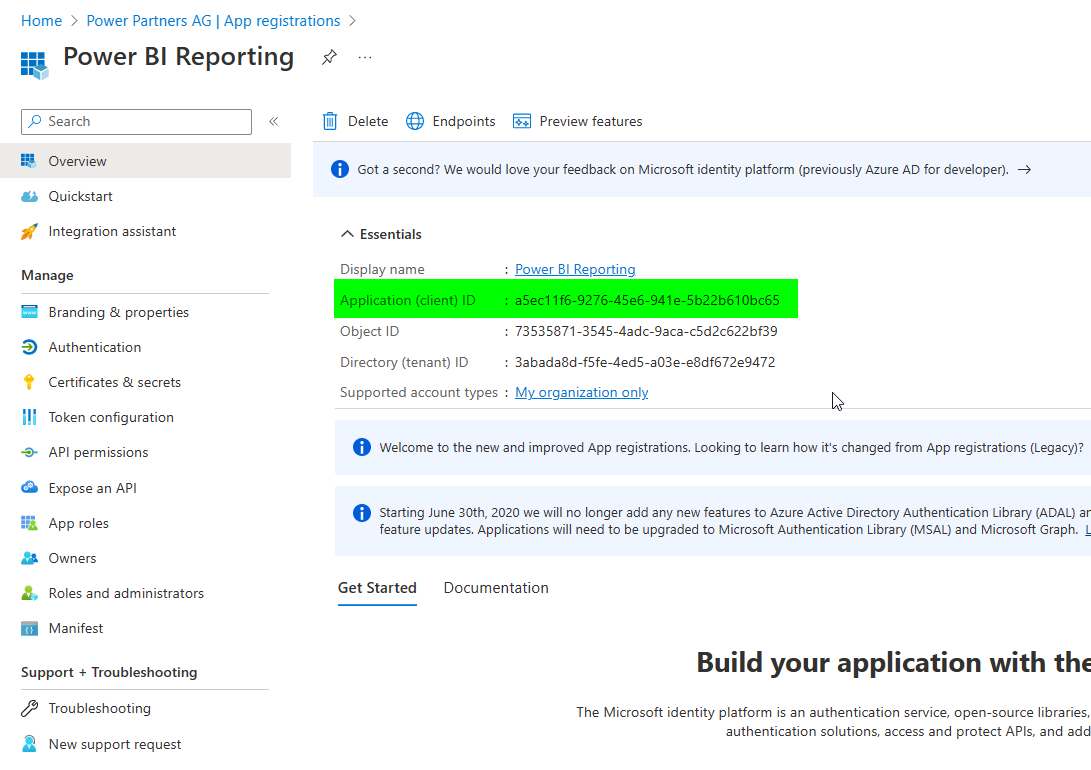
Find the redirect_uri under Authentication:
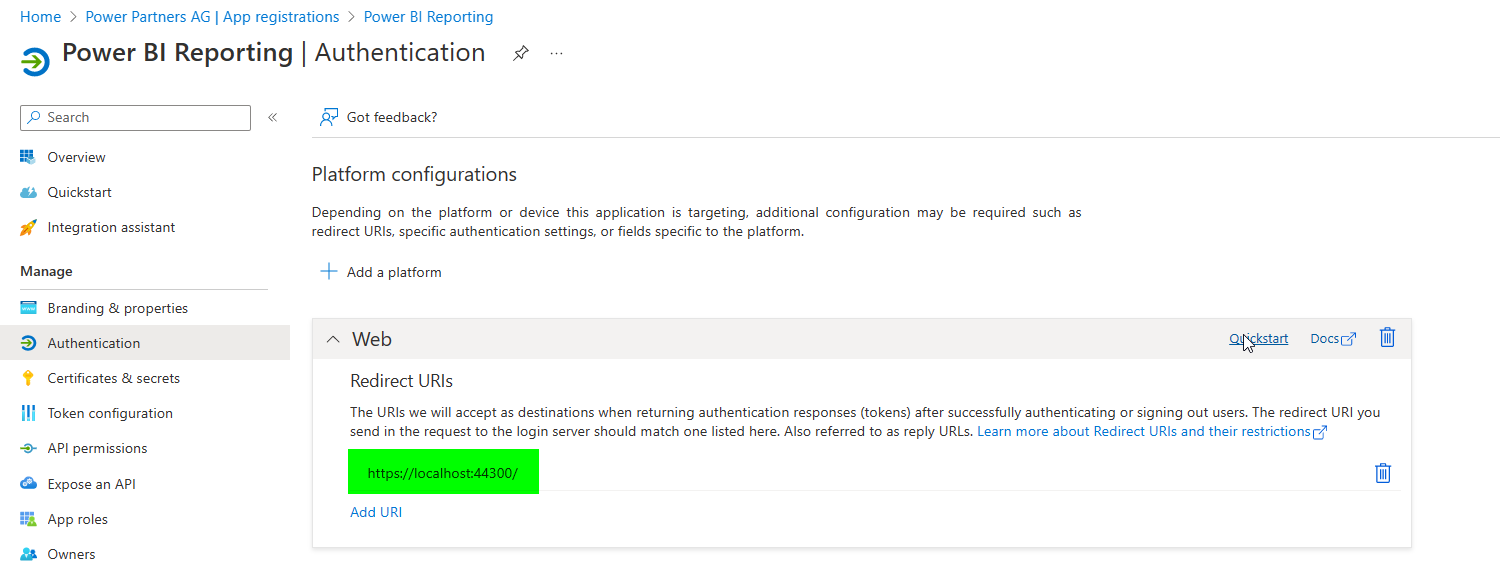
Follow these steps:
-
in a text editor, assemble your Authorization URL by replacing the
client_idand theredirect_uriin the following URL:
https://login.microsoftonline.com/common/oauth2/authorize?client_id={client_id}&response_type=code&redirect_uri=https://localhost:44300/&response_mode=query&respones_type=code&prompt=consent
NOTE: if you changed the permissions on the app, you need to prompt for consent again:
https://login.microsoftonline.com/common/oauth2/authorize?client_id={{client_id}}&response_type=code&redirect_uri={{redirect_uri}}&response_mode=query& prompt=consent
However, this might need admin consent again. -
copy and paste it into the address bar of a browser and hit enter
-
you will be redirected to a "Hmmmm... can't reach this page"
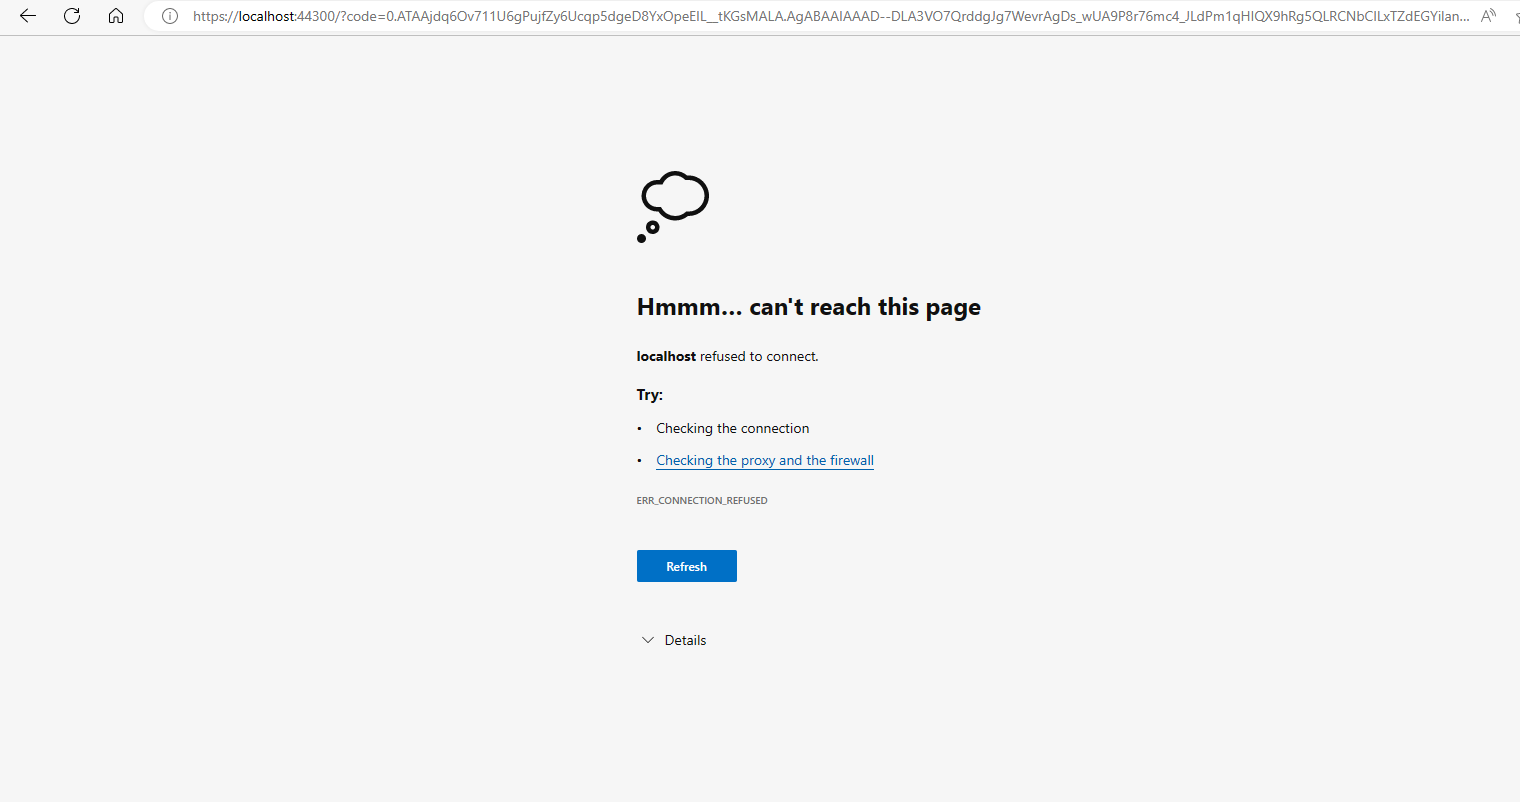
-
copy the URL from the address bar into a text editor
-
copy the
codesection of the URL
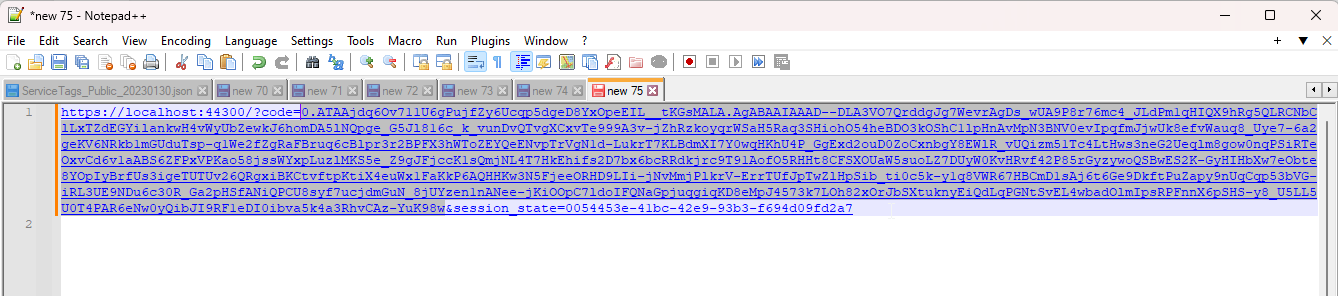
Note: In an earlier step, you Granted Admin Consent. What this means is that all users of your tenant automatically grant access to the App for the permissions defined. If you didn't Grant Admin Consent, the authentication server would list the Permissions and the user (you) would have to explicitly grant consent to these permissions.
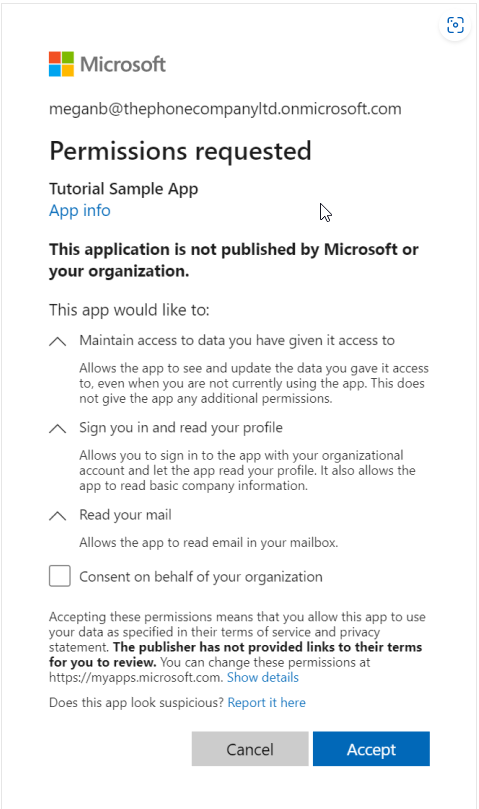
2. Get Access Token for the first time (from Authorization Code)
With the code from the previous section, you can now assemble your token request.
Token Request elements
The easiest is to use Postman. You will need the following elements:
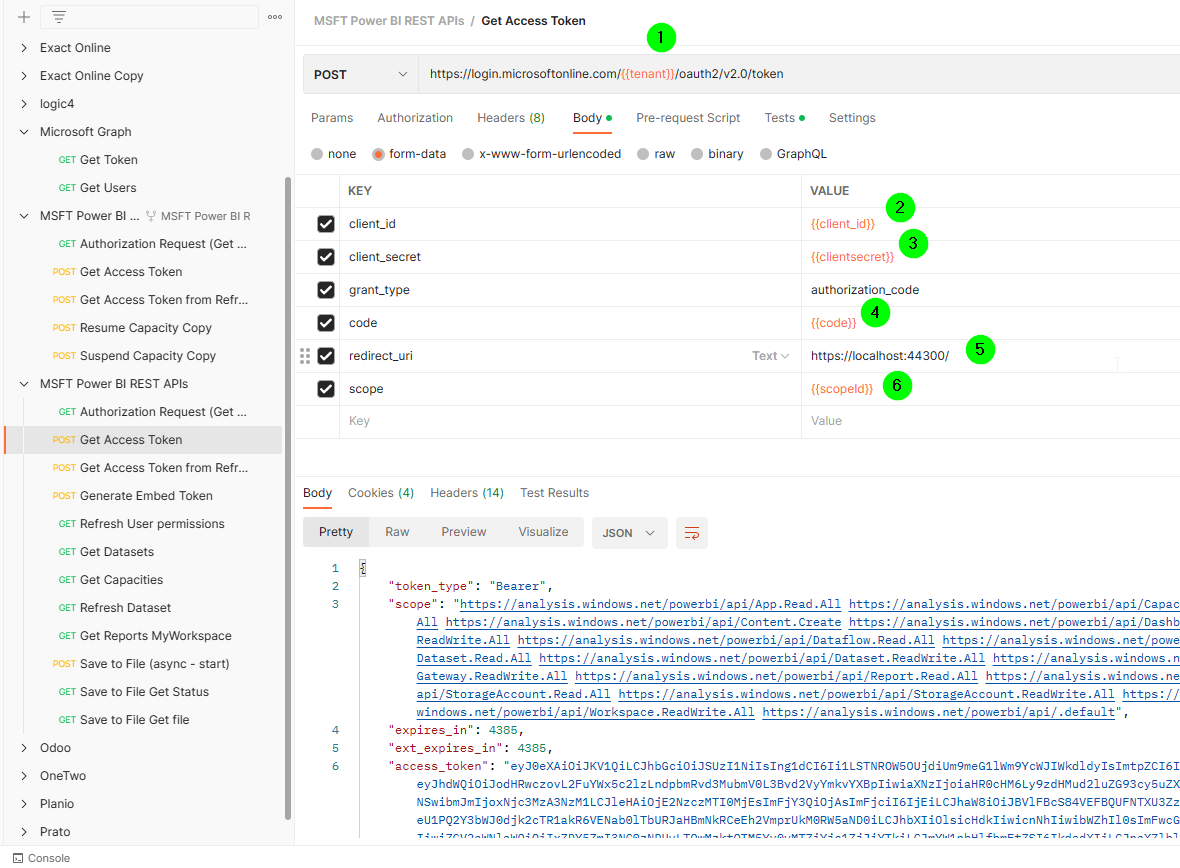
-
the
tenant_id: get it from Azure AD
![[tenant_id.png] -
the
client_id: see above -
the
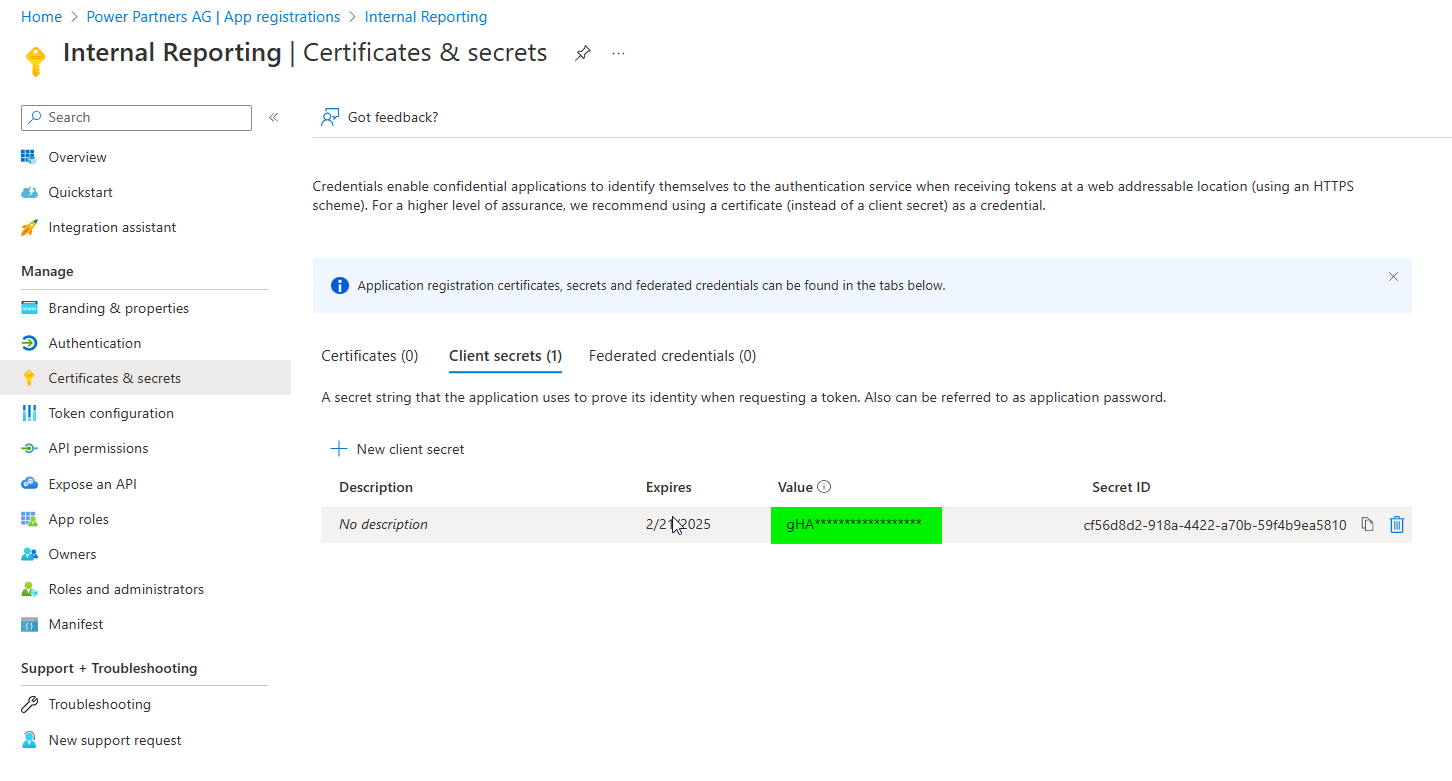
client_secret: you (hopefully) wrote it down when you created theClient Secret
-
the
code: you received it from the previous step -
the
redirect_uri: dito -
the
scope: see below
The Scope
The scope defines a couple of things, namely:
-
the permissions requested
-
the specific flavour of authorization
You cannot share an access token for multiple APIs. For this reason, we need to run the authorization flow twice, once for each API. The scope then depends on which API you are using:
-
for the Power BI REST API, use
https://analysis.windows.net/powerbi/api/.default offline_access -
for the Azure Management API, use
https://management.azure.com/.default offline_access
There are three elements in the scope:
-
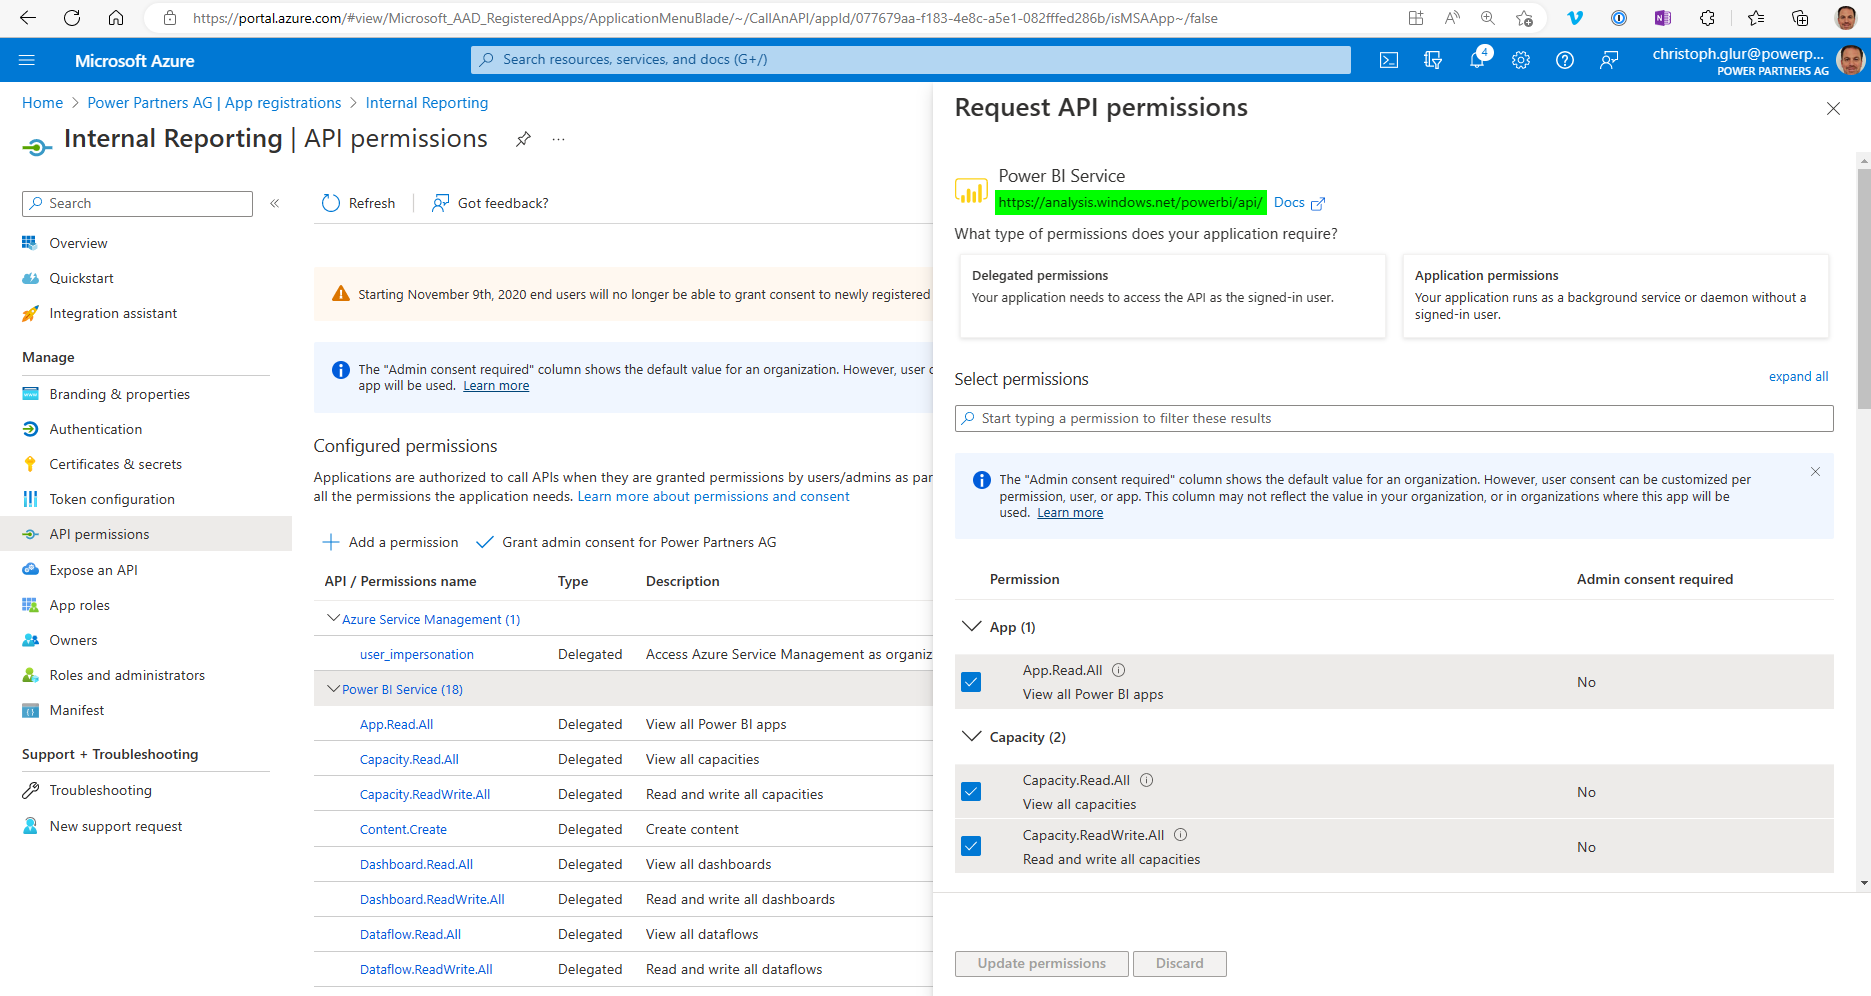
the URL of the API, e.g.
https://analysis.windows.net/powerbi/api/. You will find it under API permissions:
-
the permissions requested: in our case, we request
.default, translating into all the permissions defined in the API permissions of the App. We could, however, also request only a limited set of permissions. -
the flavour of the authentications sequence. In our case, we request
offline_access, meaning that we will get aRefresh Tokentogether with theAccess Token.
Request the Token
-
In Postman, define all the elements described above
-
Run the request as a
POSTrequest againshttps://login.microsoftonline.com/{{tenant}}/oauth2/v2.0/token -
Receive the
Access Tokenand theRefresh Token
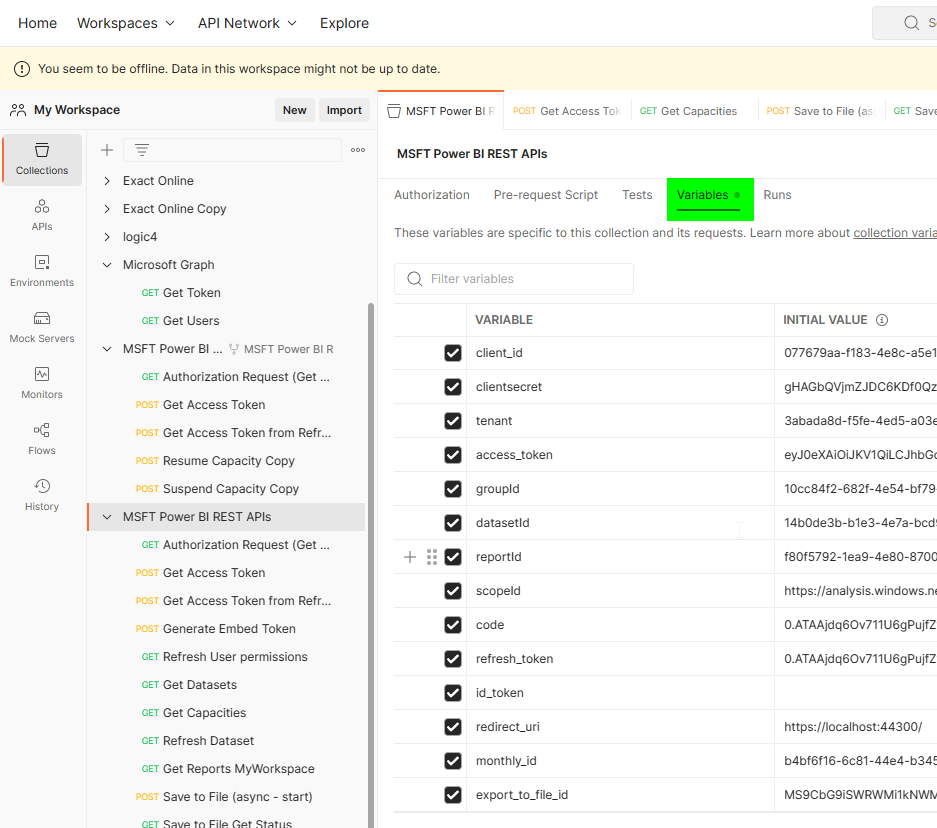
Note that for convenience, we automatically save the tokens to the Postman Collection, using a Postman-Test. This is a trick, and a bit confusing, as we are not really running a test. We are merely using the Postman Test facility as a post-execution script that saves the variables in the collection.
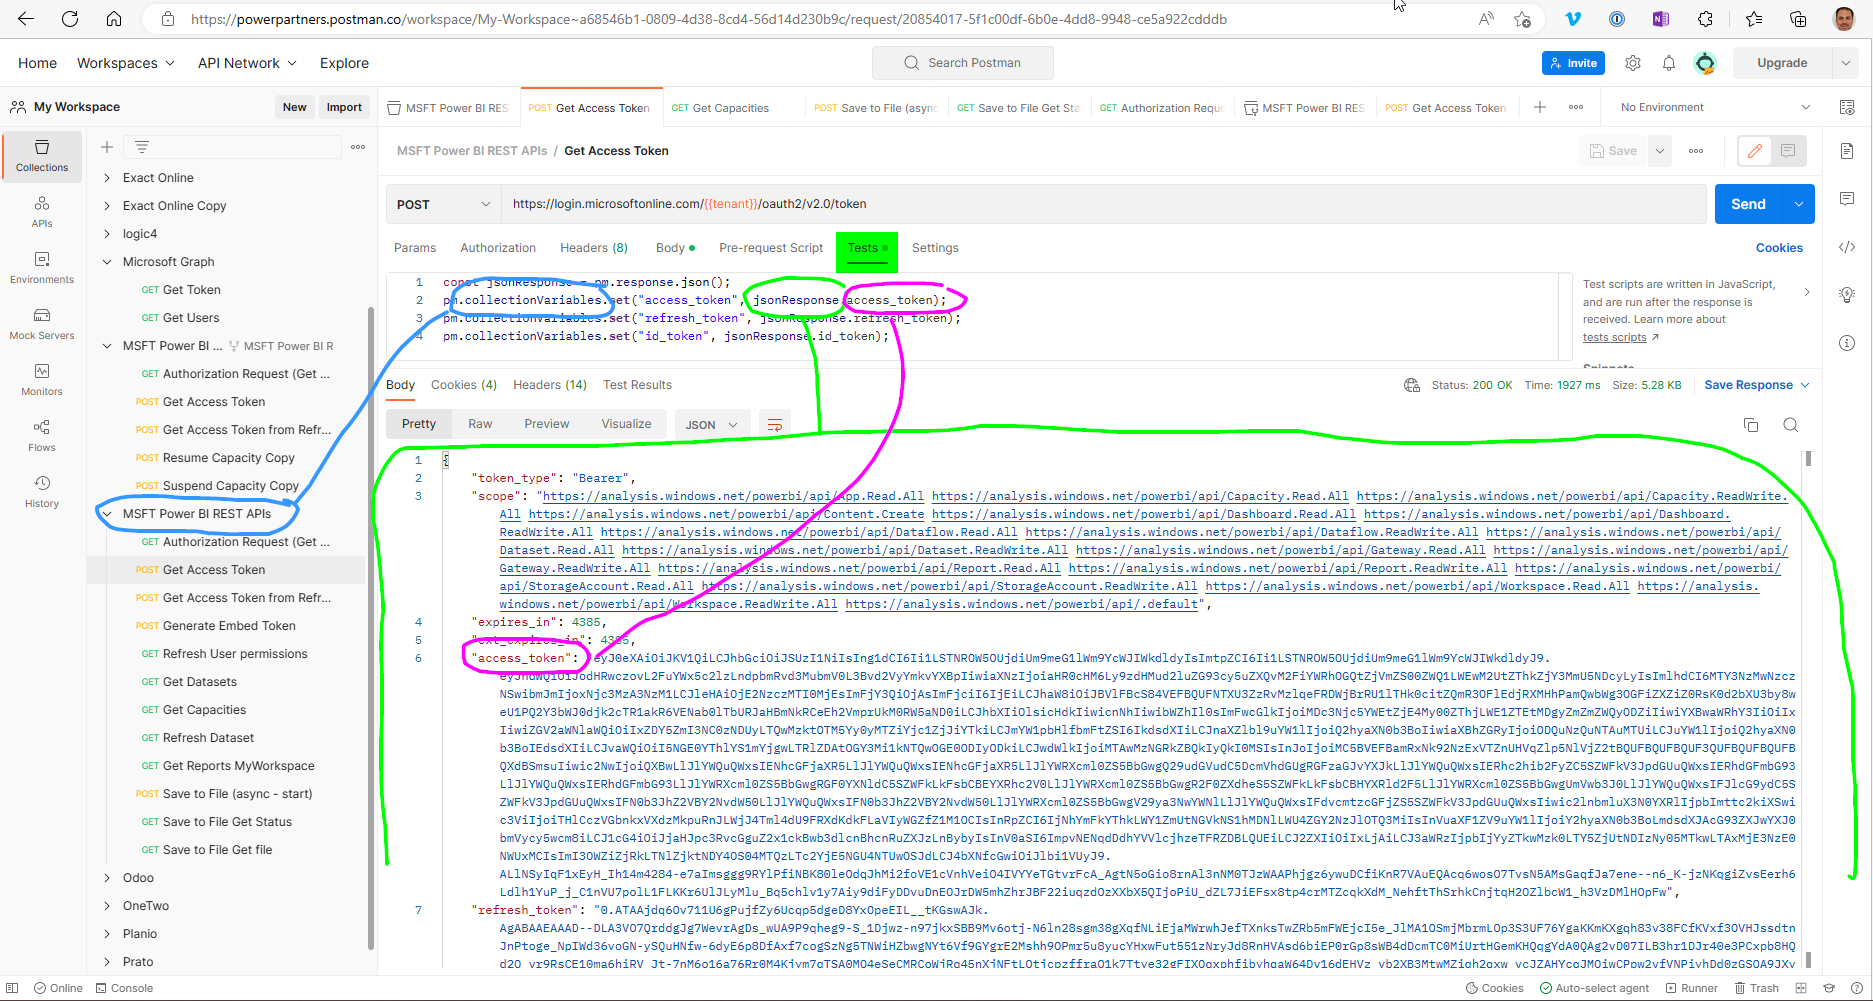
Note also the expires_in. As explained above, the Access Token is short-lived (4385 seconds in our example). Once expired, you will need the Refresh Token, which is also delivered in the response, thanks to the offline_access requested.
3. Get Access Token for subsequent times (from Refresh Token)
With the Access Token received in the previous section, you are now ready to use the APIs until the Access Token expires. You will see how to do this in the next section.
Once the Access Token expires, you will need to get a new Access Token using the Refresh Token.
The request to do so is almost the same as when you got the first Access Token from the Code. The difference is:
-
instead of sending the
Code, you send theRefresh Token. -
the
grant_typeisrefresh_token
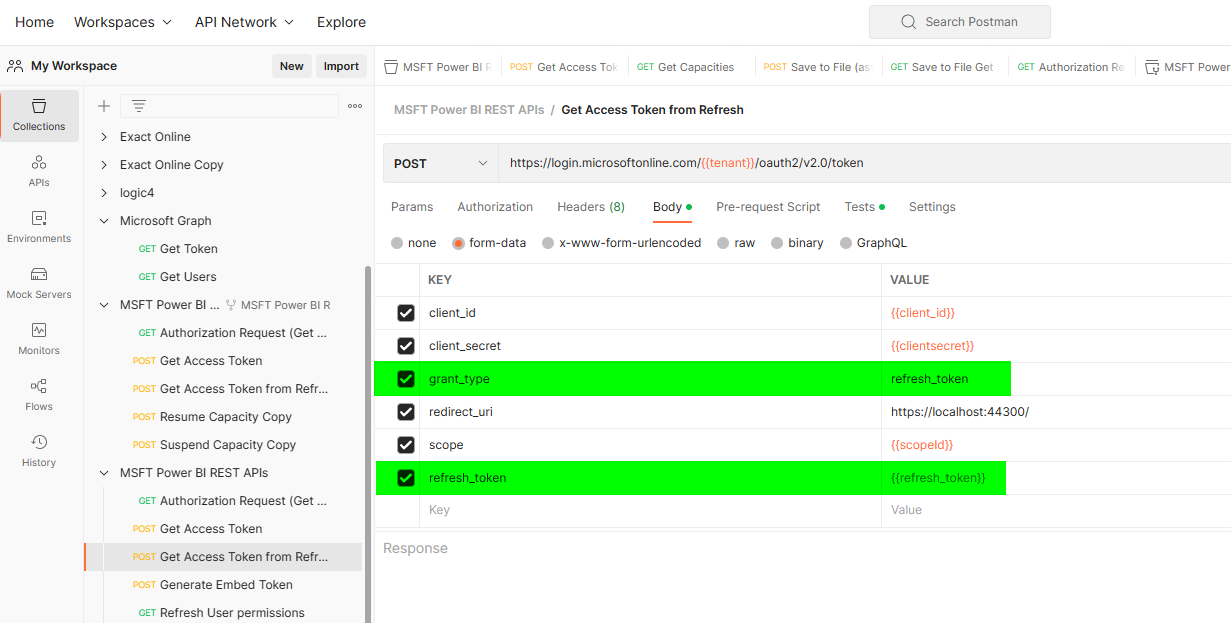
Again, we are storing the Access Token and the Refresh Token as Postman Collection Variables.
Checklist
If you have successfully followed the steps in this chapter, you have:
- an Access Token for the Power BI REST API
- a Refresh Token for the Power BI REST API
- an Access Token for the Azure Management API
- a Refresh Token for the Azure Management API