Creating an Entra App in Azure
Tldr
- Naming Convention:
- Entra app:
xxx-pwrp [application]where application is a human readable name of an application, e.g.int-pwrp Automation Server
hbt-pwrp Power BI Proxy
- Entra app:
- Client Secret
- max lifetime (720 days)
- Redirect URI: https://localhost:44300/
- Preferred flow: different libraries at pwrp use different flows. But if you have a choice, we recommend using the authorization-code flow for personalised workloads, and client-credentials for service-to-service calls.
Note on authentication
NOTE: here, we use delegated permissions (user impersonation, user owns data). Typically, the tech user is the impersonated user.
However, a nicer flow would be to
use a Service Principal. This would look like so:
-
Azure Function has a service principal (SP)
-
This SP is used already, for example to fetch the secrets from the Vault
-
We could configure the API to also allow the Azure Function SP to access the API
However, this requires a Power BI Capacity (either Power BI Embedded or Power BI Premium).
App Registration with Delegated Permissions
There are (at least) two ways to create an app:
-
manually
-
with the embed wizard: https://app.powerbi.com/embedsetup
Here, we show the manual setup.
It consists of the following steps:
-
create App
-
create secret
-
give permissions
-
grant admin consent
At the end, you will have an App. The app is an OAuth2 construct. It defines the permissions needed by our library. Later, you will be able to authorize the API to make requests on behalf of your user.
Create App
-
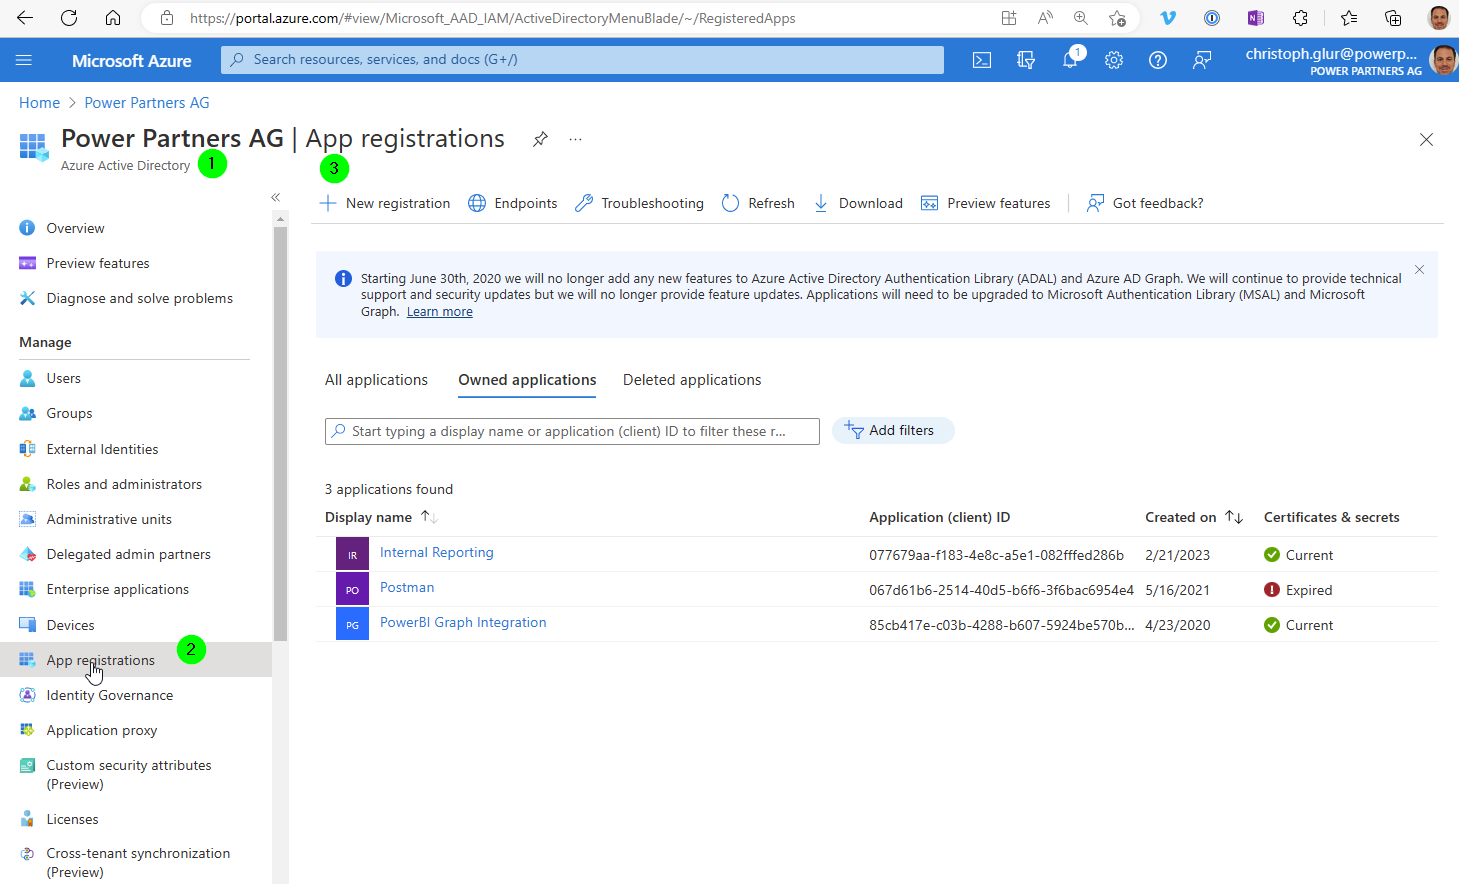
go to Entra (ex Azure AD)
-
App Registrations
-
make a new Registration
-
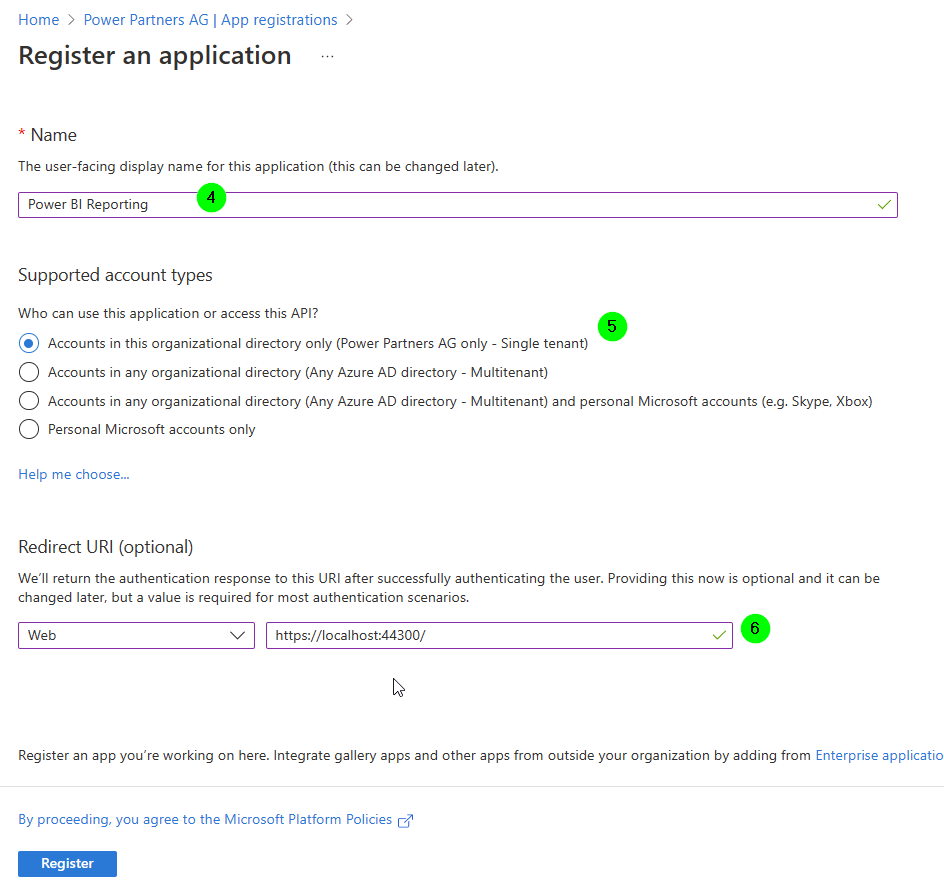
give it a name, e.g.
Power BI Automation Server -
only for tenant users
-
redirect URL: This is needed for our authentication scenario. Enter a localhost URL, e.g. https://localhost:44300/
-
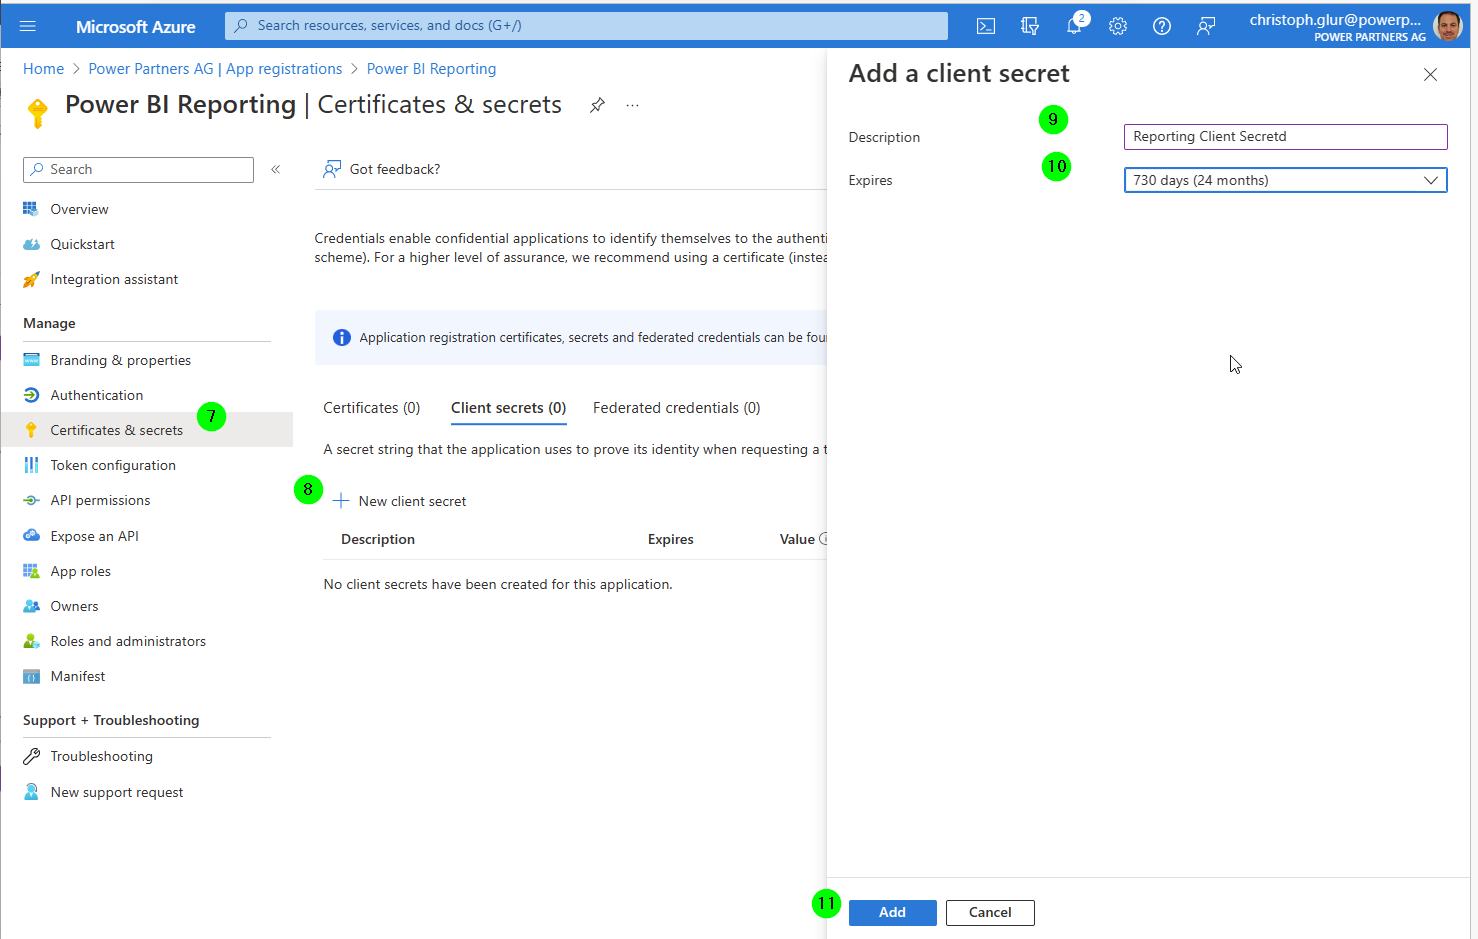
Go to
Certificates & secrets -
Add new secret
-
Give it a name
-
Set expiry to the maximum
-
Add secret
-
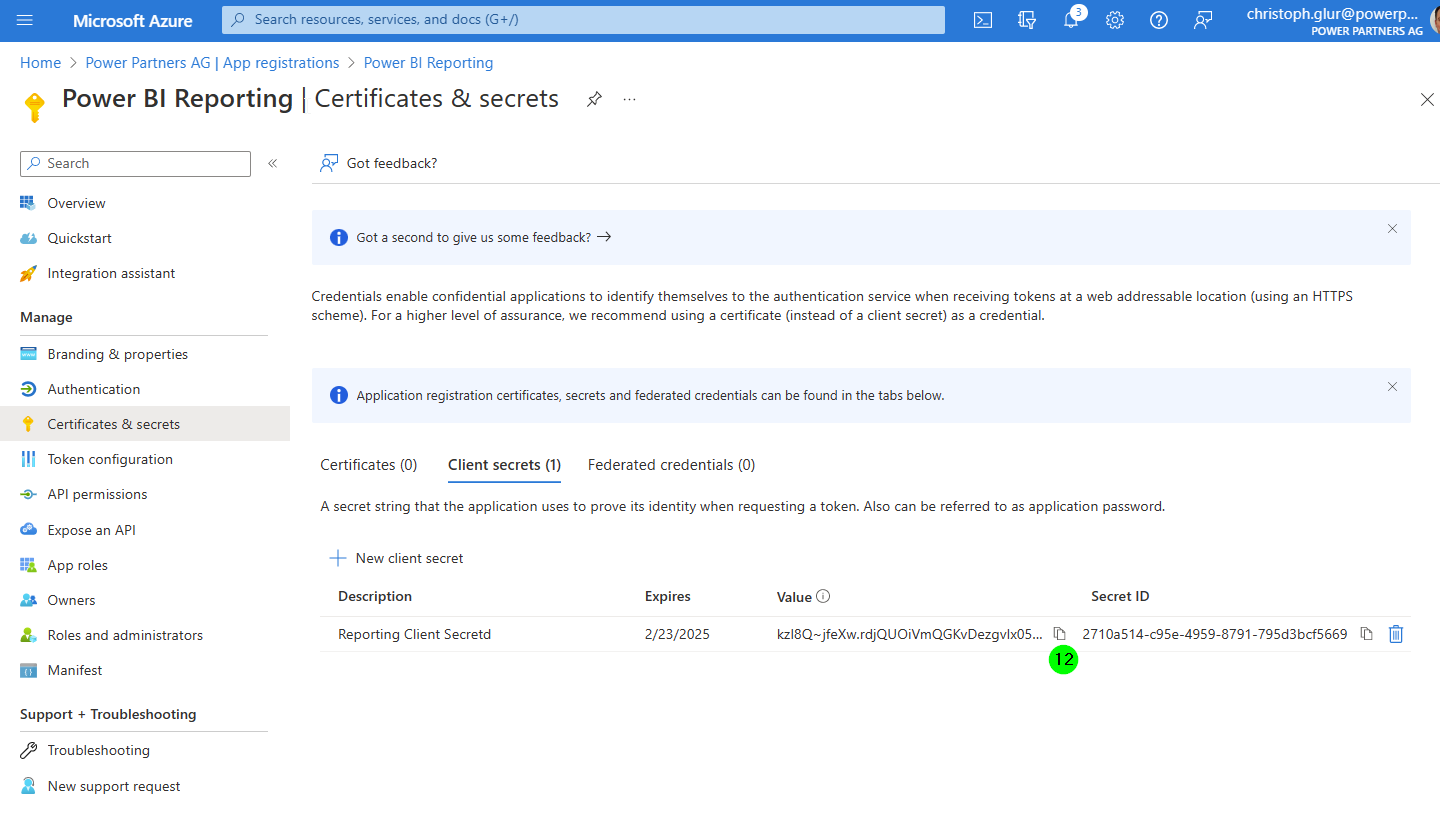
IMPORTANT: Copy the Value (this value will not be shown afterwards anymore)
-
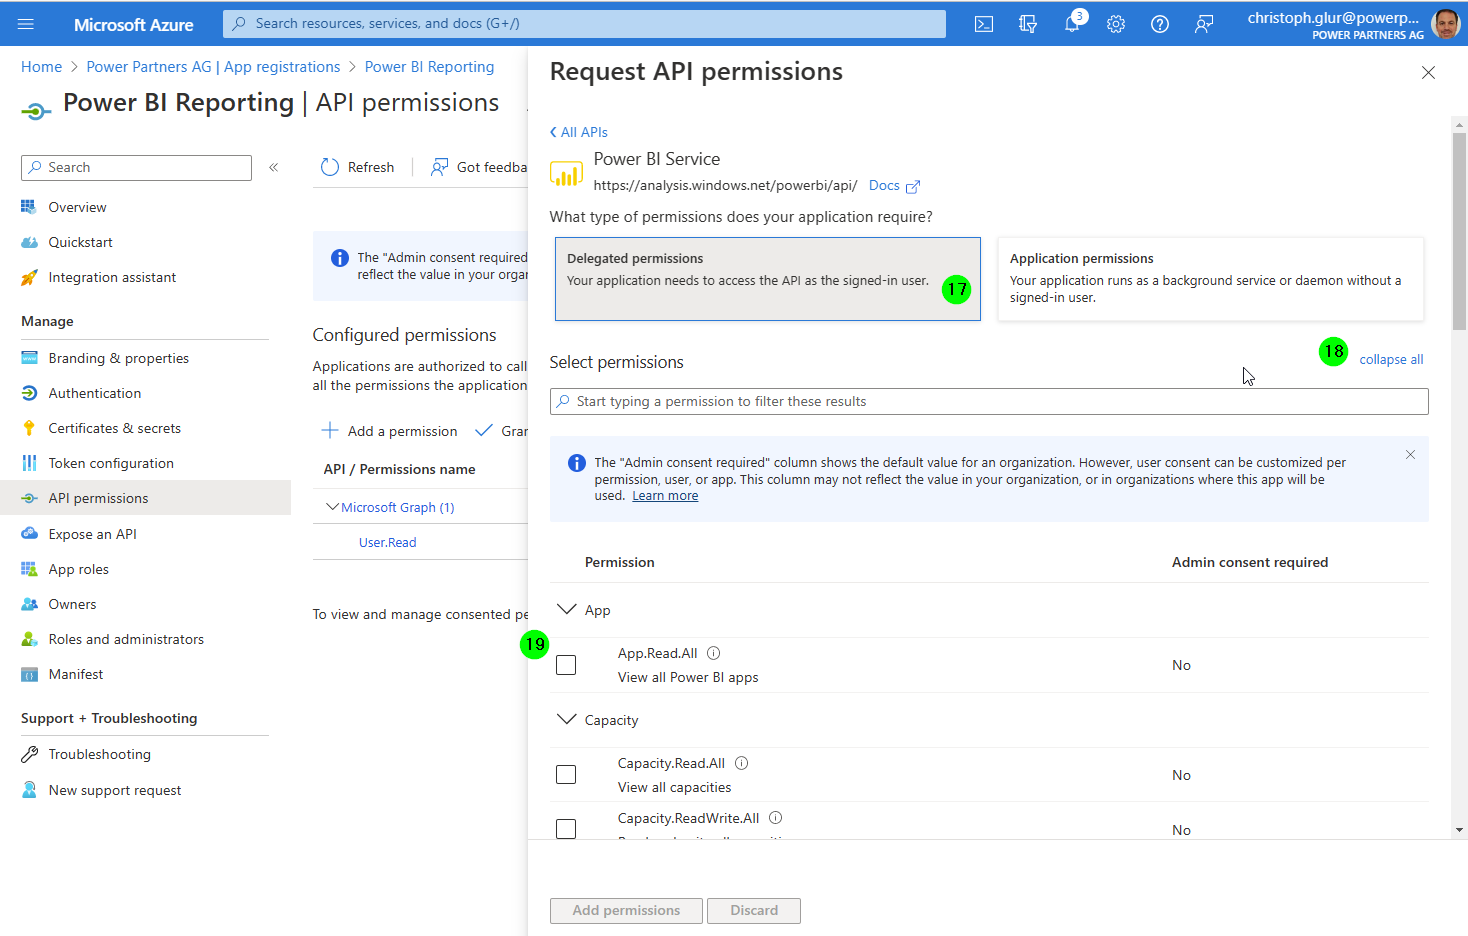
Go to API Permissions
-
Add a permission
-
Select
Power BI Service, and add all permissions forDelegated permissions -
Later -> Repeat 13 - 18, this time with
Azure Service Management -
Use
Delegated Permission -
Expand
-
Select all permissions you need (or all)
-
Grant admin consent if needed
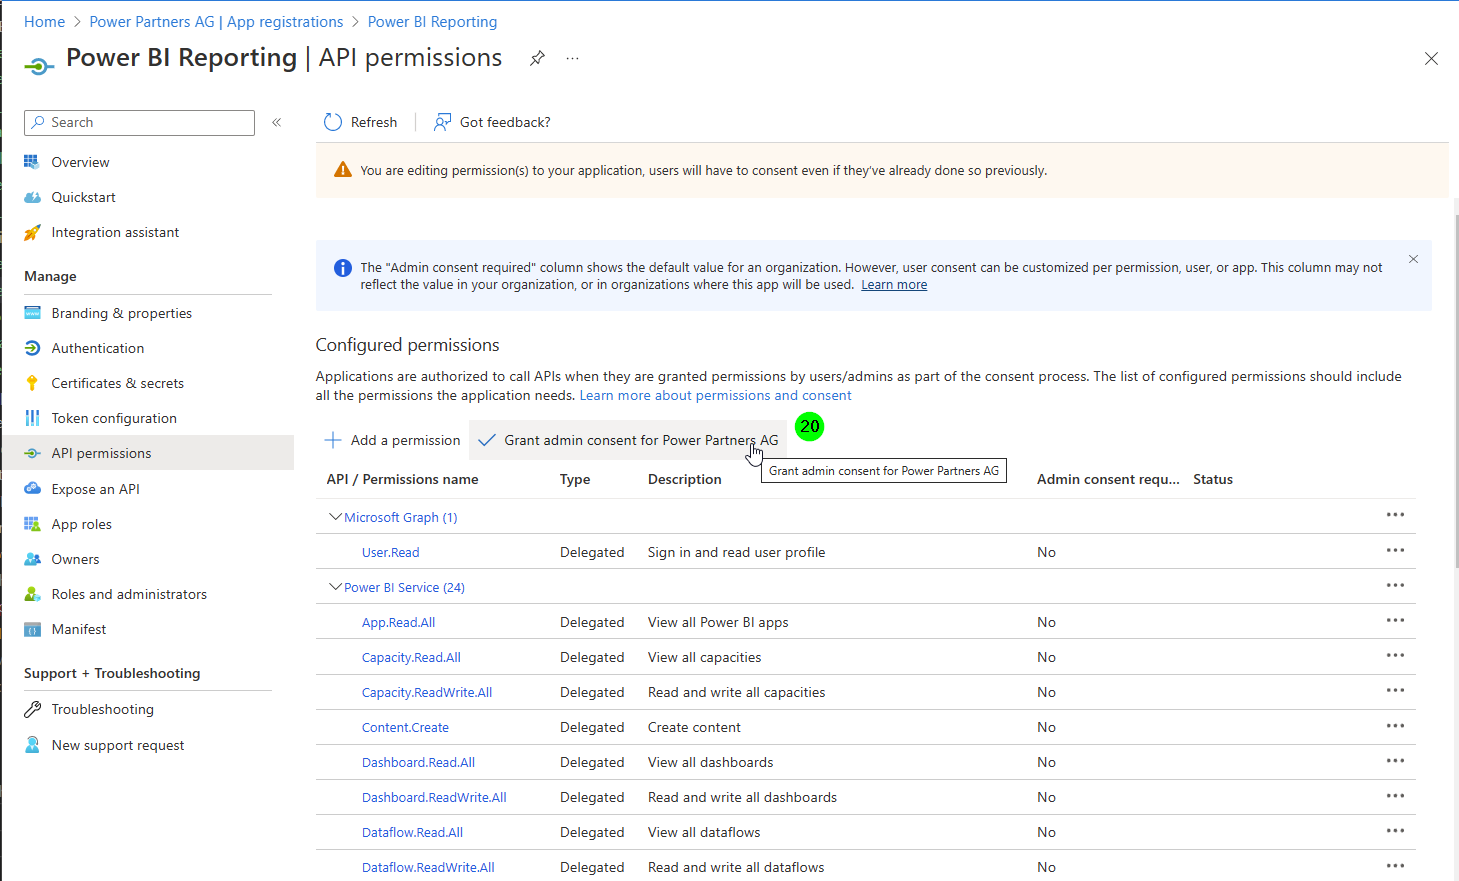
The call will most likely result in an error, but you can copy the
Checklist
- you have an app registered
- you are the owner
- the app has a secret
- you have the value of the secret noted down
- the app has all the Power BI Embed permissions
- the app has all the Azure Management API permissions
- you have a Refresh Token